Temporary Easter Egg Tie-Dye Shirts
 Before beginning let me tell you that this project is TEMPORARY!!! The dye does not last after the first machine wash. But if you still want to try it, help yourself!
You know that white shirt that has a few stains on it but you’re not quite ready to give up? Do your kids have one? How about a sweat stained white hat or dirty white shoes that no matter how many times you wash, can’t get restored to that “brand new white” that you loved? Well now is the time to give it a fresh look. Why now? Because Easter egg dye is your two-for-one deal! Dye your hard boiled eggs then use the remaining dye to tie dye your clothes! We did it and LOVE IT!
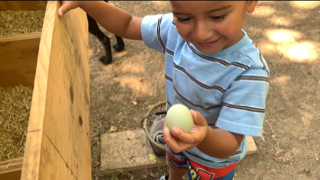
Last night we dyed all the eggs we wanted to during a quarantined family activity. Nifai was super excited because this was apparently his first time. How that didn’t happen until this year I do not know...


The colors were so vibrant this year! I think this was the first time we saw PAAS with liquid dye instead of dye tablets. And, you know me, I can’t stand to get rid of something when it still has the potential to be put to good use, like the leftover dye.
So, I thought, why not try it? Tie-dye shirts was supposed to be the spring project I was planning to do with my 9th grade students. I bought the t-shirt dye at the beginning of the year and with us being all on stay-at-home order, not sure we’ll get to do it at all if school doesn’t resume before summer break. BUT, I can do a dry-run with my kids and our leftover dye!
If you’ve never done this before you’ll need Easter egg dye, an article of clothing to dye, a fork, and rubber bands.
First we lay out our t-shirt on a flat surface. We’re using Nifai’s shirt on the kitchen counter for demonstration. If you look close, you can see a few stains on the bottom right corner. No biggie, we’ll cover those right up in a minute.

Now to get the spiral effect of the dye, you have to twist the shirt. I started doing this with my finger then smarty pants, Tava, said “Use a fork, mom”.

Put the fork in the middle of the shirt, or wherever you want the spiral effect. Nifai chose the middle. Look at his cute little hand all steady & ready to go 🙂

Then with the fork in place on the shirt, you’re going to twist it.
Just like you would on a plate of spaghetti.

And you keep twisting until it has rolled up into a pinwheel circle.


Now you’re going to secure it in that spiral circle with rubber bands as tight as you can.
We only had the tiny plastic rubber bands for your hair but it worked!
Since Nifai’s shirt is small, I only needed 4 rubber bands to keep it together. Larger shirts may need more. No rubber bands? Just use string to tie it! Hence the name, TIE-dye.
I did three vertical and one horizontal.

Once we were sure it wouldn’t come undone, we put it in the sink.

We only had green and blue left so that’s what we used for Nifai’s shirt. Tava and I used the rest of the red and yellow on our shirts yesterday. We started by pouring green in the middle of the spiral.


Then we used the blue on the outside.
What dripped or pooled on the sink bottom got soaked on the backside of the shirt. Perfect!

Then we put it outside in the sun to dry.

According to Nifai, the sun was taking too long to dry it. He was so anxious to wear it right away! Even though it was still damp after a few hours outside, we decided to go ahead and throw it in the dryer by itself (I didn’t want the dye touching other clothes yet) to dry faster. So we took the rubber bands off and threw it in on a regular heat setting.
This was the result. Not bad with only 2 dye colors!

He was so eager to wear it that he put it on as soon as it was completely dry. Then he made his super hero pose for the camera. Hey look—it matches his shorts! NICE!!!

Tava’s and my shirt finished drying outside. Here’s Tava’s...
And mine!

UPDATE: After letting it dry for 2 days then washing in the washing machine on cold—the dye washed out. Not 100% but mostly... like maybe 90%.
So while it was a fun project, it was not long lasting.
Anyway, this was a fun project with the kids, they loved their shirts, and we didn’t waste dye! By the way, our Easter egg dye kit was 50% off as of yesterday and that was 3 days before Easter. I’m guessing less people are spending money on Easter items due to this Coronavirus pandemic. So maybe after Easter there will be an even BIGGER discount! Our kit was originally $2.99 and we got it for $1.50. Not a bad price to color eggs and tie-dye shirts so give it a try. Don’t forget to wear your mask and gloves when you go to the grocery store. Normally at this point in my blog I would say “Happy Dye-ing” but that just sounds morbid. We’ll just go with Happy Easter! 🐣


Comments
Post a Comment