Vimahi Farm Happenings: Chicken Coop READY!!

It's ready! It's READY! Our chickens are finally enjoying the outside habitat of their special chicken coop courtesy of the Vimahi farmhands! David and the boys sure did a great job for their first time of building what I think to be the most beautiful coop. I love it so much it's hard to stop looking at it. I wish we had right now was a bench so I can sit out there and watch the chickens all day. I don't know why I enjoy watching chickens. Maybe because it's calming in a unique way and you can really learn quite a few life lessons from watching chickens. Maybe it just helps put me in touch with nature.


Anyway, it was a fun project to watch David and the boys construct. We initially wanted to build a coop out of PVC like one we had found on the internet with plans. The problem was, when we went to Home Depot to get the fittings, they didn't have everything we needed! So then we thought--shoot, we're either going to end up on a hunt to several stores for everything we need, or we need to pick a new coop to build. CURSE YOU PVC!!!!
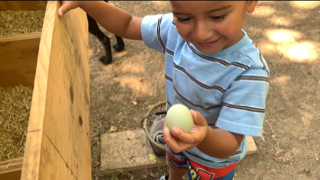
That's when we found the A-shaped coop from a website online. Best part--it said you could build this coop for about $100. SCORE! We bought the wood, hinges and wire. David found some ideas for a chicken feeder on youtube and DID find enough PVC to build that. We have yet to build the nesting boxes but we figured we still have at least 2 months to do that since the chickens aren't mature enough to lay eggs just yet. Worst part about building this coop? It actually took about $200 to build. But you know what? It will last for a LOOOOONG time so I think in the end it was well worth it. Eventually, I'd like to paint it but we're going to wait on that until after some major things get moving with our family life and we're in a good place for painting. Are you curious? Good! Stay tuned :)

We put the chickens in Friday around noon and they were happily wandering around their new space, making discoveries and pecking at everything they could get their beaks on. By about 8pm I could see how strong the winds were blowing and began to worry that the chickens weren't quite ready for the storm that was brewing--remember it's their first time outside! I quickly found some scraps around the house to build a ladder to the indoor coop space. I hoped the chickens would learn how to use it and take shelter if needed.

NOPE! They weathered the storm and still haven't climbed up into that nice indoor part of the coop. But they survived the storm so all is well.

I love that David taught the boys how to use the tools required to make this coop and the bonding they had while doing so. My minor contributions were stapling some of the wire around the coop and adding the roosting perch. At first I thought it would be a fun project for David and I. But with me still working and with the boys being the age they are--it was a perfect opportunity for father-son time. I'm so glad I was able to document it all.
Check out our youtube video of this project from my Joy In DIYS youtube channel link here. Please consider subscribing :)
By the way, after only days our Labrador/Shepherd mix has already created a dog run/track around the coop. I think he finds quite a bit of sport in chasing them from one corner to another. I'm hoping his fun with this will wear off and he'll be more of a protector than a teaser.


Comments
Post a Comment